Sunday, February 23, 2014

Sewing cloths for Nauvoo

Gregg and I will be wearing pioneer cloths 6 days a week for the next year and a half. Nauvoo has their own pattern styles which they want us to follow specifically. There is a great deal of detailing that can't be seen. I have spent about 3 weeks working 8-10 hours each day to complete the work. It was fun once I finished up other projects and then got motivated to start cutting.

Below are two of my dresses with coordinating aprons. The pink apron can be worn with either the green or pink dress.


The apron below actually has a small purple print that is hard to see. It can be worn with other dresses as well. Nauvoo is very specific about the color of fabric. It can't be chosen from primary colors, can't be faded, but should be some what muted. I hope I did it right.

 I had the fabric store cut the blue dress fabric below after I had already cut the apron material. They were short 3/4 of a yard and I was a bit worried about having enough material. In the end, it worked great and I was glad I had experience as a youth working pattern pieces to fit on smaller than recommended pieces of fabric.

 This was the first dress I made. I bought the dress fabric without the apron fabric and then had trouble finding fabric to coordinate. Gregg actually found the gold print used for the apron and it is one of my favorite.

 I need white aprons when I work in the prophet's home. The tucks at the bottom are called grow tucks. I suspect I won't be growing taller while on my mission but I guess it's better to be prepared. :)

 Below are three vests for Gregg. They were taken from a regular men's vest pattern and altered to fit the style of the time which means no pockets, ties, and straight across on the bottom.

I needed a couple of pantaloons and a petticoat. This was the only garment I could add lace and/or ribbon. Most of the white cloths were taken from sheets rather than buying fabric by the yard. I hope I don't regret it.

I made four shirts for Gregg. As you see, the collar is different and the sleeves are fuller than a man's typical shirt today.

Then after talking to the sewing department at Nauvoo, I took their suggestion and visited a Goodwill. I bought 9 more shirts and remodeled them to fit Gregg and the time. With humid temperatures in the summer, it was recommended to have plenty of shirts and I was happy not to sew any more than needed.
So, there it is. I am finished for now but plan to take my sewing machine with me to Nauvoo for repairs or remakes. I feel much better with this project behind me.

(Side note: the craft room worked marvelously for the large project. I could spread out, make a mess, keep the different projects separate and organized, heat and cool the room only when needed, had plenty of light on demand, and didn't have to clean up for 3 weeks since it was out of the way.)

Changing the office to accommodate more employees

When Andrew Light started working for us the first of October 2013, his first recommendation was to go paperless. Getting rid of all the old file cabinets was time consuming but brilliant. I went through each and every file looking for trailing documents that may be needed later. I saved less than one drawer full of files and destroyed 15 drawers full of old files that would no longer be needed.

The next task was to add room dividers, windows, and doors to allow for private conversations to happen in four different locations. We also wanted a space to keep drinks to offer visiting clients.

We started designing the office in November, did the majority of the work between Christmas and New Years, and was finished the middle of January.

Andrew died of liver failure on January 17, 2014 without seeing the finished office. He was very instrumental in coming up with a workable plan and we miss him dearly. However, we are deeply grateful for the assistance and ideas he gave us before his early death.

 As you can see, Gregg's office is in the same spot as he's been for 10 years or so but with Andy's suggestion we turned his desk the other direction so he can see the front of the office easier. We also continued the wall further into the room and added a glass door for times his customers need privacy.


 We added another wall between the reception room and the 2nd office. With a large picture window, it's easy to keep track of clients coming and going but also has a glass door to close for private conversations.


 This picture shows the opening for the two doors. As you see, they are at an angle symmetrical to each other. It was taken while still under construction of course.

We cut the reception desk and swung it around to divide the work space from the front door. This was Gregg's idea. We left the small end of the reception desk in the same place to store the office printer etc.

 Allstate has a web site for office design. The accent colors and signage ideas were gleaned from there. We have either an Allstate sign or Good-hands logo behind each desk where customers will see it while being serviced.

Across from the reception desk is a waiting area. The chairs and small table with mirror and light were one of the most expensive additions. However, it gives a nice, professional touch.

 This is the new office behind the glass wall. We bought a new desk which was the 2nd most expensive item. There is seating room between the desk and the glass wall to the right of the desk as show here.

Another great addition are the dual monitors to the computers in both offices. This too was Andy's suggestion. Gregg, Andy, and now our new employee, Keith, can work faster and more efficiently switching between the two monitors.

This pictures shows the refrigerator and cabinet by the back door which we have stocked with numerous varieties of soft drinks and bottled water. It has yet to be used for client use but we hope it will be a friendly gesture when clients come to the office. Again, this was Andy's wish.

 In the back corner of office #2 we have a room divider with an Allstate logo. Behind this wall is one more working space.
Gregg and I call this space the "Leave me alone calling corner" for lack of a better name. We plan to hire a solicitor to call for leads from this out of the way spot. This area was designed multiple times and in the end the table had to be custom cut to fit. (Another 1/2 circle table found a home at our house since it was larger than advertised and simply didn't fit anywhere in the office.) However, the working space is functional the way it turned out.

 Here is a picture of where office #2 will be. We hauled off the old metal desk and filing cabinets and painted the accent wall. The new wall with the picture window will be put across this area.

 Here is a picture of Gregg's office after we painted the accent wall and moved his desk but before the wall was extended and the door was added.

 Here is a picture of the reception desk before we cut it and swung part of it around to divide the room. The posters were Andy's suggestion and made the room look better. I didn't get pictures before they were hung.


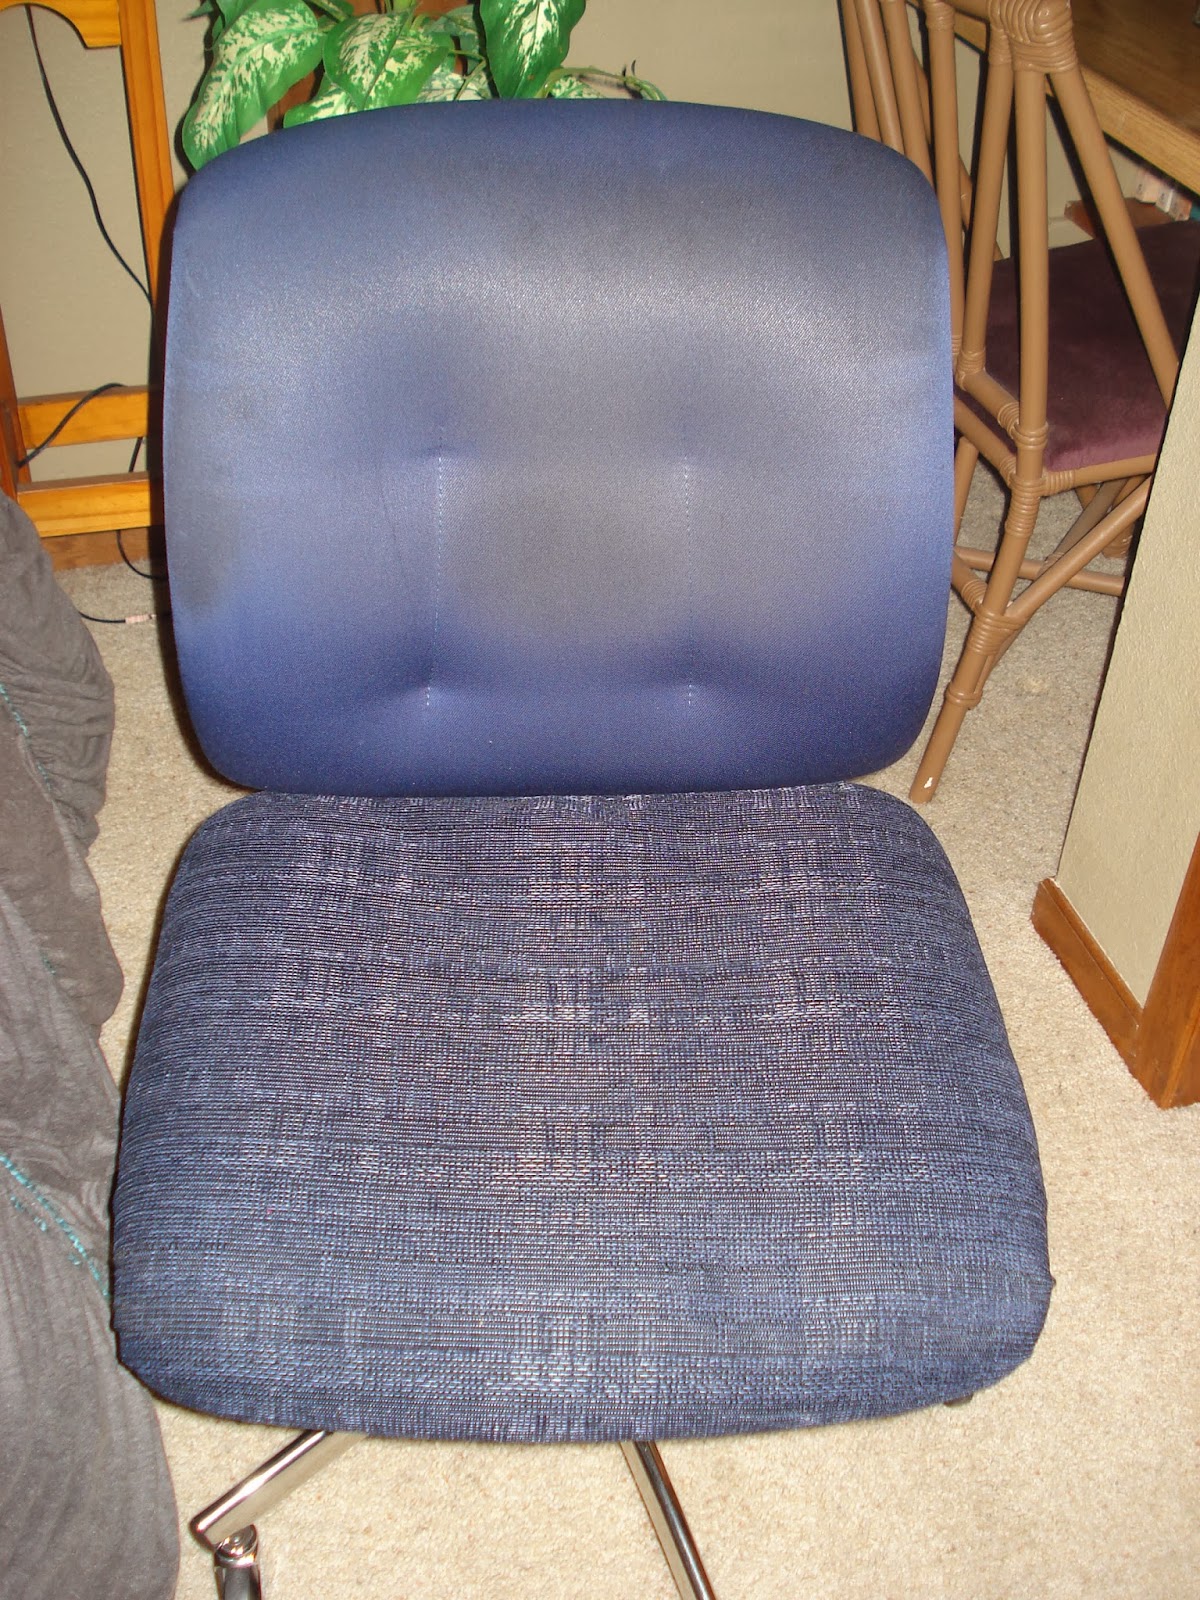
 I saved as much furniture as possible. This old chair was really comfortable but worn out. I covered the seat cushion and cleaned the back. A furniture restoration company showed me how to make the seat move up and down. We thought it was broken but we just needed to turn it upside down to turn the seat and adjust the height.

 We bought these chairs off Craig's list for $15 each. After painting and recovering the cushions, they took on a fun look.

Gregg's chair was in good shape but we no longer have cranberry in the office. I used fabric medium and paint to change it to blue. It looks like all the other furniture now. As you see the blue here, it is still wet and brighter than the finished product.

You can barely see the blue chair that Gregg is sitting on. It looks just like the other blue chairs since I color matched a piece of the blue fabric.


I also painted the room divider to match the back accent wall. The sound proofed wall was also bought used and quite plain. With the Good-hands logo hanging with it, it looks like it belongs rather than an eye sore.

We now have Keith and Betty bonded with Allstate and training to take over while Gregg and I leave for a mission to Nauvoo IL. We are hoping to add one more employee to our team to call for leads.

Sunday, December 8, 2013

Getting a house ready to sell


I started preparing the house for the market on Monday. I spent all day Monday and Tuesday in the yard because a winter storm was coming. It snowed Tuesday night and by Wednesday, I started on the inside and satisfied with the work accomplished outside. I swept out the shed, cleaned up debris, sucked up dirt and leaves. etc. etc.

Wednesday was spent cleaning and filling holes in the dry wall. Wednesday night I hired a lady to clean the bathrooms and kitchen appliances. She was more of a maintenance cleaner than a deep cleaner. Some of her work had to be redone.

Thursday I hired Edie Irey's cleaning company. Her help couldn't come due to the fridged weather, but she was awesome. She cleaned baseboards, window tracks, and door frames. I started painting walls and baseboards. Gregg came after work and we painted into the night. Gregg's help was invaluable.

Friday morning we finished painting and Edie worked on the kitchen and wood floors. Carpet cleaners came around 11 that morning.  I worked on miscellaneous repairs, painting, caulking, and cleaning.

Saturday morning Gregg helped me stage the house, and we moved heavy furniture around. We planned to clean out the garage, but it was too cold to do much. We were about finished when I went to close the lid on the five gallon bucket of paint. Feeling exhausted, I lost my balance while stepping on the lid, and paint went all over the floor. I went home for the shampooer and Gregg spent the next couple of hours cleaning up the mess. However, we were out of the house by 11 AM just in time for the first showing.

Below is the great room


The only furniture I brought in were 2 bar stools.

I used many of the same decorations that was on top of the kitchen cabinets before. I added a few of my own and rearranged everything.

Below is the kids bath.

Most of the bedrooms only got a window covering and a silk plant on the window seal. However, this room got the rocking horse and giant bear. The stars were already there.

The master bath turned out great. I bought towels and miscellaneous pieces but most of it came from my house.


The down stairs bathroom received new towels and a bit more greenery.

My favorite turned out to be the half bath but I forgot to get a picture.

Reupholstering the Love Seat

New chairs in the living room.
 One ottoman found a home in the computer room.


I thought I would buy new furniture for the West wing. After looking at prices, I decided to buy two chairs and fiture out a way to save the existing love sea. First I painted and glazed the wooden accent pieces.
 Then I used the existing couch cover along with another couch cover taken off the couch in the west wing and remade it for a tighter fix. After hand sewing around the wood sections, tucking under the edges and staple gunning them down, I used upholstery tacks (actually, these are thumb tacks painted rubbed bronze) to hold the fabric in place and add a decorative touch..

I painted and glazed end tables to match the wood on the love seat.

Below is the finished room.

Before pictures
Below is the sloppy look of the couch before reworking it.

Flood and vermin proofing the yard

We raised the section on the right here to keep water from funneling in. We have a drain that feeds into the french drain so the water will eventually get pumped out into the ditch. However, one week prior to the Boulder Floods as we call them, we noticed rain water funneling in so quickly that the water was backing up into the house. We were home when it happened and caught it quickly so no permanent damage was done. We got the chronic problem fixed prior to the heavy floods. It was certainly a blessing to notice it when we did.

 Below is my favorite fix. The down spout is connected to underground drainage that funnels out into the yard. However, when the drains fill up, water would spill out of the down spout and funnel into the area where the walk out basement was created. If that funnels in too quickly, the water will find its way into the house. We took a regular plastic down spout gizmo and cut a whole large enough for the black drainage pipe to fit in. After sliding the gizmo over the black drainage pipe, we caulked the gap. It worked beautifully when the Boulder Floods came. Rain water poured down the spout, filled up the pipes in the yard and then spilled over into the plastic gizmo. From there it innocently found its way into the grass away from the foundation. It worked so well, we did the same thing in two other locations.

We widened the gate so that a wider lawn mower can get into the back yard. Lawn services are often cheaper if your backyard has good access.

Check out the fence post in the center of the photograph below. There is a huge owl perched there that is apparently the cause of death to a number of small rabbits we found victimized in the yard. Does anyone have any ideas on how to keep it around? Sure is a good solution to rabbits.

See the fence latch below. Along with metal edging along the bottom of the gate, the rabbits have found it difficult to get in with this tight fit.

Before Pictures
Here is a picture of the ground level before raising the right corner. Water funneled in much like the leaves you see here.

Below is the gate prior to widening it. Gregg and I did the labor ourselves when the handyman kept putting us off. We are happy with the results.


Sunday, October 20, 2013

How to make a root cellar without digging

After visiting my Aunt Lois last summer, I decided that  I wanted to have fresh apples, carrots, potatoes, and onions all year round. The pioneers got it right with a root seller which keeps the produce cool, frost free, and aired out to prevent molding.

Most root sellers are underground.. However, a few years ago, we dug out our basement to make a forced walk out. It was only about 4 feet down, but nevertheless, I do not want to ever dig again...ever.

So after checking on line (I love all the info you can get on line.) I realized that our shed that is tucked neatly under our deck and snuggled up next to the north side of the house, should work well.


I started by caulking the bottom side between each plank. The top side was already caulked and painted with a roof over that, but I knew that any leaks would be devastating so I'd need to do a little overkill.


Next I put in 2 inch Styrofoam that has a 10 R value. This was much harder than I expected. It had to be tight enough to keep out the heat or cold but still loose enough to fit between each rafter. Styrofoam is recommended in an area that could possible get moisture. It is also has the highest insulative value for the thickness.


Next I added a vertical piece of Styrofoam directly below the horizontal piece on each end. There were many gaps on the ends since the blocks were so difficult to maneuver.


Below the Styrofoam, I put regular fiberglass insulation. It was much easier to install and cheaper.

During the summer months, the room will need ventilation. We added one vent near the ceiling and the other one as low as possible  in between the same two studs. The vents can open and close and have metal mesh to keep out animals, but it wasn't enough for winter months. Obviously, during the winter, the vents need to be insulated so I wrapped a piece of Styrofoam with bubble wrap. It was tricky to sew the seams together and even trickier to turn it right side out, but I did it and then stuffed the Styrofoam inside and sewed and taped the end closed. I included two flaps on each side with which to pull it in and out of the wall. It has a fairly tight fit and the flaps proved to be a necessity.


Then I used bubble wrap and sealed the insulation off. This was tricky too because I didn't want to take all the hanging shelves down so I had to cut around all those obstacles. However, it worked well in the end.


I was trying to repair some plastic shelves to put the produce on when I noticed these shelves tossed aside at Lowe's. They were being thrown away and the clerk said I could have them. It fits perfectly and now the test is on. The room has air, it shouldn't freeze, but it should stay cool.

Another plus is that our sump pump is in the corner. Though most of the drain pipes are below ground and shouldn't freeze, I've always wondered if sub zero temperatures would create a problem. Common sense says that if the temperature is that cold, water won't be seeping into the well either, but it's still good to know that the room is insulated.

I think my pioneer ancestors would be proud.